Skip to content
 Seeing cracks, holes, or water damage in your walls can be frustrating, but knowing how to repair plaster walls makes a big difference. The process involves identifying the issue, selecting the appropriate materials, and applying the correct techniques to achieve a smooth finish. With a bit of guidance, you can restore your walls and preserve their charm.
Plaster wall repair is essential when cracks in plaster walls begin to spread or deepen, as this can lead to further damage. Ignoring holes and damage in plaster walls can lead to serious issues, especially with plaster wall water damage. Quick attention and professional fixes help preserve the structure and appearance of historic or older homes.
So, what steps should you take first to guarantee a successful repair? Let’s take a closer look at plaster repair techniques now!
Understanding Plaster Wall Construction and Common Damage Types
To effectively repair your plaster walls, it’s crucial to understand how they’re constructed, especially if they’re traditional lath and plaster systems. Knowing these fundamentals will help you tackle any issues with confidence.

Traditional Lath and Plaster Wall Systems
Lath and plaster walls are hallmarks of craftsmanship in homes built before the mid 20th century. These intricate systems rely on wooden laths layered with plaster, which offers both strength and character. To preserve your walls’ charm:
- Identify areas showing age, wear, or deterioration
- Understand the materials used in their construction
- Evaluate minor versus extensive damage
- Consider appropriate repair approaches
- Maintain original features when possible
Types of Plaster Wall Damage
Recognizing plaster wall damage helps prevent minor issues from becoming major repairs. Different types of damage call for different responses. Common culprits include:
- Hairline cracks from settling or temperature shifts
- Large fissures that signal structural movement
- Holes due to impacts or removed fixtures
- Water stains from leaks or humidity
- Soft spots suggesting moisture infiltration
Essential Tools and Materials for Plaster Wall Repair
Having the right tools at hand makes all the difference when tackling plaster wall repairs. They ensure efficiency, safety, and a professional looking finish, starting with the basics below. You’ll need:
- A putty knife for applying compound
- A trowel for surface smoothing
- Sandpaper or a sanding block to refine the finish
- A utility knife for trimming damaged edges
- A bucket for mixing materials
- A drop cloth to protect your space from mess
- A reliable patching compound or plaster repair kit
- Safety gear, gloves, goggles, and a mask for protection
Having these items ready streamlines your repair process and supports a clean, durable outcome.
How to Repair Plaster Wall Cracks: Step by Step Process
Cracks in plaster walls, small holes, and damage often signal underlying issues. Timely plaster repair can prevent plaster wall water damage and structural deterioration. Professional patching, sanding, and sealing ensure long lasting results and restore your wall’s original smooth and durable finish.
Cracks in plaster walls may appear minor, but they require proper attention. Learn a structured method for repairing plaster walls with cracks to restore both appearance and durability with confidence.
Preparing Cracks for Repair
Begin by assessing each crack carefully. Remove crumbling edges with a utility knife or chisel, then widen slightly for better adhesion. Clear debris using a brush or vacuum, and dampen deep cracks to prevent rapid drying.
This prep step ensures repair materials bond effectively. For severe damage, some homeowners opt to repair plaster walls with drywall as an alternative. Once cleaned and ready, you’re set to move on to filling and reinforcing.
Crack Filling and Reinforcement Methods
Use a quality plaster compound or spackling paste to fill the cracks. Apply with a putty knife, pressing firmly to ensure a solid hold. For wider gaps, reinforce with fiberglass mesh tape before smoothing the surface.
Feather the edges for seamless blending, then let the compound dry according to the instructions. Light sanding after drying provides a clean finish that sets the stage for painting. This step restores your wall to its original appearance.
Finishing and Blending Repaired Cracks
After repairs, lightly sand the area for a smooth transition. Clean any dust with a damp cloth, then apply primer to promote paint adhesion. Use a matching paint color to blend the repair with the surrounding wall, multiple coats might be needed for full coverage.
Step back to inspect your work and refine as needed for consistency. The goal is a flawless finish that restores the wall’s appearance and maintains its durability.
Patching Holes in Plaster Walls: Small to Large Repairs
From tiny dings to larger gaps, repairing plaster holes requires the right technique. Explore the essentials for patching damage and reviving the integrity of your walls.

Small Hole Repair Techniques
Fixing small holes in plaster is a quick and easy process. Clean the damaged area, then apply spackle with a putty knife, smoothing and feathering the edges as needed. Once dry, sand gently for an even finish. A touch of paint completes the look. It’s perfect for simple lath and plaster wall repair tasks.
Medium to Large Hole Patching
Larger plaster wall holes need more prep. Clean the area and insert mesh or lath if required. Apply compound, smooth it out, and let it dry. Sand, then paint for full coverage. With care and technique, you’ll restore your walls to their original condition.
Can You Repair Plaster Walls with Drywall? Hybrid Solutions
If you’re facing extensive damage to your plaster walls, you might wonder if integrating drywall is a viable option. Let’s explore how to combine these materials for a seamless and effective repair.
When Drywall Integration Makes Sense
If your plaster walls show signs of crumbling, severe cracks, or water damage, integrating drywall may be a practical alternative. It’s ideal for areas needing electrical updates or insulation and can speed up the restoration process.
Still, if the original surface is intact, mainly restoring it preserves the vintage charm. Discover how to repair plaster walls versus replacing them by exploring approaches tailored to your specific space.
Drywall Patch Installation Process
When repairing extensive plaster wall damage, installing a drywall patch can restore both function and form. Follow these key steps:
- Remove loose plaster and debris around the damaged area
- Clean the surface thoroughly for proper adhesion
- Measure the hole and cut drywall to fit snugly
- Screw the patch securely so it sits flush with the wall
- Apply joint compound and feather the edges smoothly
- Let it dry completely before sanding
- Wipe away dust and finish with primer
- Paint to match the surrounding plaster
Blending Drywall with Existing Plaster
Combining drywall with plaster provides an innovative solution for repairs while preserving the character of the building. Here’s how to integrate them smoothly:
- Choose drywall for larger damaged sections
- Cut and shape it to fit the affected area
- Attach securely to wall studs for stability
- Cover seams with joint compound, feathering into plaster
- Allow the compound to dry thoroughly
- Sand for a flush, seamless surface
- Wipe clean and prepare for painting
- Match paint tones and texture to the original wall
Water Damage Repair and Prevention in Plaster Walls
Holes and damage in plaster walls can start small but grow quickly if left untreated. Address cracks in plaster walls early with effective plaster wall repair. Moisture infiltration may cause plaster wall water damage, leading to staining or crumbling, avoiding costly repairs with fast, professional solutions.
Quick action is key when water damage hits plaster walls. First, fix any leaks to stop further issues. Remove damp plaster using a chisel and hammer, wear protective gear while doing so. Allow the area to dry fully and confirm with a moisture meter before reapplying plaster.
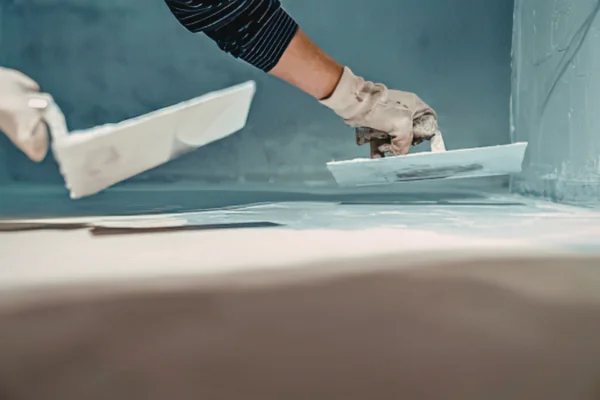
Prevent future problems by inspecting your roof, gutters, and plumbing often. Waterproof paints or sealants can add extra protection, helping your walls stay resilient against moisture and damage over time.
Professional Tips for Long Lasting Plaster Wall Repairs
Want your repairs to go the distance? Lasting results come from careful technique and quality materials. Use these expert tips to keep your walls looking flawless:
- Choose a durable, high grade plaster mix
- Clean and dry the surface thoroughly
- Apply several thin layers, let each dry completely
- Use mesh backing for larger areas
- Sand smoothly to blend the repaired sections
- Prime before painting for better adhesion
These practical methods support strong, lasting lath and plaster repair a smart way to maintain charm and integrity over time.
Final Thoughts
Knowing how to repair plaster walls empowers you to tackle damage confidently. Proper preparation, careful application, and patience are key to a smooth finish. Repaint for seamless blending, and maintain your walls regularly. With each successful repair, your home and your DIY skills will shine brighter.
Don’t let plaster wall water damage or cracks in plaster walls ruin your home’s charm. Expert plaster wall repair quickly and cleanly fixes holes and damage in plaster walls. Whether restoring vintage elegance or patching modern finishes, proper care protects your interior walls from future problems.
Don’t let wall damage worsen over time, get a free consultation and restore your walls to their original beauty.
Frequently Asked Questions
1. How Long Does Plaster Wall Repair Typically Take?
Plaster wall repair usually takes a few hours to a couple of days, depending on the extent of the damage. You’ll need time for drying and curing, so be patient for the best results.
2. Can I Paint Over Repaired Plaster Immediately?
You can’t paint over repaired plaster immediately. It needs time to cure and dry completely, usually around a week. Rushing might lead to peeling or cracking, so be patient for the best results.
3. What Causes Cracks in Plaster Walls?
Cracks in plaster walls often occur due to temperature fluctuations, building settlement, or excessive moisture. You may also notice them due to improper installation or age, which can weaken the plaster over time.
4. Is It Safe to Repair Plaster Walls Myself?
Yes, it’s generally safe to repair plaster walls yourself if you’re comfortable with basic tools and techniques. Just make sure you follow proper safety precautions, and don’t hesitate to seek local stucco professional help for extensive damage.
5. How Do I Know if My Plaster Wall Needs Professional Help?
You’ll know your plaster wall needs professional help if cracks are wider than a quarter inch, you see significant water damage, or if the surface crumbles easily. Don’t hesitate to consult an expert for safety.